This is the fourth video of four depicting the journey of an open field to a food forest. In this video the swales are shown after planting with bare root stock.
Tag Archives: Design
Mistakes and Other Regrets in the Design Process
As the new year begins, many people’s minds turn to the coulda, shoulda, wouldas of life. Like most people, my mind follows similar directions but when it comes to Landscape Design, I think my entire process is riddled with coulda, shoulda, wouldas. I find myself constantly saying if I had known this or that, I would have or I would not have. While there is absolutely no way to completely avoid the shouldas, learning, studying, observing and in depth planning can help to avoid some, if not most of them. Below are some of my thoughts for someone entering the design or redesign process today.
My first thought is PERMACULTURE. Back in the early 1990’s when I was making the initial plans for The Land, permacluture was in its infancy and I knew nothing about it. I learned about it, from a friend,
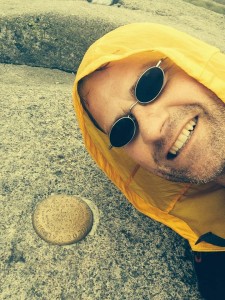
My Permaculture Guru
when discussing with him how I wanted to make a vacant field on my property more productive. Permaculture is a very large topic and encompasses many ideas from the designing of communities for efficiency and sustainability to using plants in combinations, called guilds in permaculture, to make them more productive, disease resistant and sustainable. If I had known more about permaculture principles and design:
- I would have thought more about the space where my barn was placed. While I had the equipment here to clear the spot, I would have cleared a larger area to create space for a future garden, chicken coop and composting area.
- I would have positioned the barn on a different axis to allow for better capture of sun and wind for renewable energy production.
- The pond nearest my barn would have included both the elevation and piping to filter and use water from this pond in my house and garden areas.
- When I prepared the barn for living, I would have plumbed it to separate grey water from sewage to better us this valuable resource.
My second thought is soil fertility and food production. When making my first decisions about meeting my goals for The Land, my efforts were focused on accessibility, timber production and recreation. In the process of meeting these goals, I paid very little attention to soil fertility and crop production. A big mistake. My excuse is that my dreams of living at the property and having the time to tend to crops were well off in the future. Looking back, there were many things I could have done to enhance soil fertility and food production while building roads and ponds.
What I could have done differently:
- I could have saved more of the top soil, moved to create roads and ponds, and moved it to locations I might want to plant in the future.
- I spent a great deal of money and time trying to get species of lumber trees absent from The Land to grow. Most of these planting failed because of environmental conditions and my lack of understanding of what different species need and experience. Looking back, I believe this money and effort might have been better spent developing hedge rows of fruit and berry producing shrubs that would today be feeding people and providing shelter and deer barriers for future plantings and gardens.
- I would have planted the fields and open areas, I created, with nitrogen fixers and mulch producing plants that would have built soil and stopped erosion.
I don’t believe that any plan is perfect, nor can all mistakes be avoided. Everything we do on our property and in life are functions of who we are at the time and the resources available to us (time, money, tools, etc.). However, a lot of mistakes can be avoided by taking more time in the planning process and taking the long view, considering what you might want to do in the future and allowing for those posibilities.
This is meant to encourage a new land owner or someone who owns land and is at a place where they want to develop it, to do the homework. Observation and education can be more productive in the early stages of development than perspiration.
The side bar of this website has a few links to websites I have found helpful and books that are good at getting the imagination started and talk about what is possible. Here is a fun TED talk that I think provides an introduction to the idea of Permaculture and its possibilities.
Helpful Resources
The theme of the current season is thankfulness and I would like to carry that theme into this blog post.
I am thankful for many things but perhaps the top of the list is being able to “own” this piece of property, live in the midst of its beauty and diversity and share it with others. It would take many pages to even begin to describe the richness and depth this has added to my life and The Land. If you own a piece of property, I encourage you to share it and its bounty with others.
I am thankful for the labor, presence and advice given by all those who have come to The Land and shared their time, energy and wisdom with me. They have enhanced this place
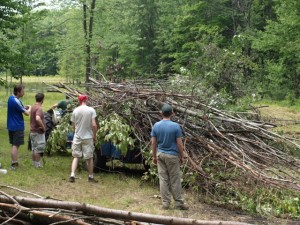
Workers helping to clear brush. greatly and in many ways it would not be the place that it is without their input.
greatly.
I am also thankful for the following organizations and agencies, and their employees and volunteers, who have been very helpful in developing The Land and teaching me to be a better landowner. Each one has had an impact on my thinking and the way I have managed The Land and projects. One of the great blessings of the internet is that it makes the information of all government agencies and many educational institutions available to users worldwide. One caveat is to be careful to filter information to be sure it is applicable in your climate and growing zone.
My local, state and federal government have all made contributions. I know it is more popular to complain about the government but the wealth of information available from government agencies is boundless. Granted it often takes a lot of searching through departments, articles and links because our governments are not very good at building efficient, easy to use web sites. However, the information is usually free, well written and helpful. I have also found government employees and volunteers at agencies like the Soil and Water Conservation
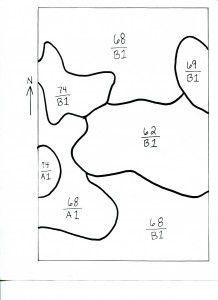
Soil Zones on The Land
and the Department of Environmental Conservation extremely helpful. Sadly, many of these programs are strapped for resources and have suffered staff cut backs, so be patient when scheduling an appointment. Employees of these agencies have marked my woods for forest improvement, helped me select pond sites, and produce maps of my land, like the one on the right showing soil zones. All for free.
Similar to the above, local and state educational institutions can be very helpful. Many of these resources are free. Some on-line courses may charge a nominal fee for use. One that helped me was called the Master Forest Owner Program which is an outreach program of Cornell University. It was inexpensive and filled with useful information for anyone who owns a piece of forest land. It also gave me an opportunity to volunteer and help other landowners.
A local organization that was very helpful to me is The New York State Forest Owner’s Association. Their locally sponsored woods walks gave me the opportunity to meet other landowners, see their property and projects, and hear first hand about their successes and failures. I invited them to have a woods walk on my property and they came and gave me a wealth of ideas and suggestions. I think the value of finding and joining an organization of people with similar interests can be priceless.
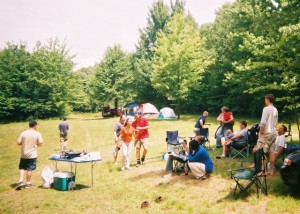
Community Breakfast
By nature, I think most rural landowners tend toward independence and self-sufficiency. I know I can be a bit of an isolationist but over the last 20+ years, I have learned that being open to the contributions and knowledge of others can be very helpful. Opening my mind and property to others has had great benefits.
Beginning the Design Process
When I purchased The Land, the parcel was a 1400 X 2100 foot rectangle of unimproved land. By unimproved, I mean there were no structures, no ponds, a small game/RV trail, that divided the land unevenly, was the only path and no signs of agricultural use or forest improvement could be found.
Beyond knowing, from my pre-purchase and subsequent walks, that the property had my desired features of easy access, potential pond site(s) and an old field succession forest, I knew very little about the property and very little about the exact location of the various features on the property. I knew I wanted to build roads and trails to give general access to the property. I knew I wanted a pond and I knew I wanted to build a barn/cabin space. In other words, I knew what I wanted but I was very short on knowledge like where and how.
I tried walking around with a compass to locate myself and some of the features, but quickly became frustrated by obstacles to my line of sight, measurement and simply finding my way back to the same spot on a different day. I needed a way of placing myself and certain desirable features in an exact location on the property. My solution was to map the property by putting stakes in the ground. This is 20+years ago, before GPS, and Google maps.

Josh
The first thing I did was to mark the boundary lines of my property clearly with blazes on three sides, the county road marked the 4th, as described in the previous post. Next, with the help of my son, who like my other children, has always been willing to indulge my obsessive nature, I created a grid layout for the property. To do this, we first made about 150 stakes out of 2 X 2’s. Each stake was about 4 feet long, sharpened on one end and painted orange on the other. The orange end was marked with 2 numbers after it was placed; the distance
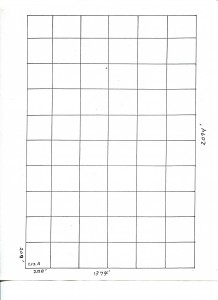
The initial grid created to map the land. Each square is 200 feet by 200 feet.
into the land on a south north access and under that number the distance across the land on the east west axis. So a stake labeled 400/600 was 400 feet north of the southern boundary (the county road) and 600 feet west of the eastern boundary (my neighbor’s field). Then using a rented surveyor’s wheel, Josh and I, walked the entire east boundary putting a stake at 200 foot intervals. We then walked each 200 foot increment east to west putting a stake every 200 feet. Each stake was numbered as above. On the picture to the right, the first intersection in the lower right corner was 200/200. The last intersection in the upper left corner is 1800/1000. Once this was done, we could easily locate any spot on the property and begin to
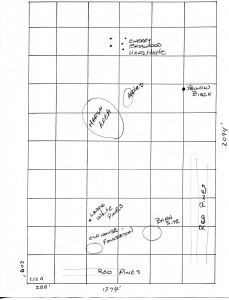
Sample of Initial Noyes
draw a map of the property and its features.
The map at the left is similar to one of the first maps I made showing the location of the marshy area with low lying shrubs, reeds, and ferns that became the field that drained into the first pond we dug and proposed locations for the first structure. You can see, I noted points of interest like the location of trees of particular interest or value and stands of a particular variety. You will note those things of interest to you and those features that get you closer to your goals.
Today, there are many different tools that are available to you on the internet like Google Maps and there are some shareware products that help with creating the types of maps that I did by hand. I like, use and see great value in technology but I am far from an expert so I am not going to offer any recommendations just one suggestion since I found these articles helpful in understanding what is possible. If you are interested you can find the articles here.
One final thought. I understand that my stake and grid method of mapping my property is labor intensive compared to computer generated maps. However, in the process of doing the mapping, I really got to know my property on a very intimate level. To this day Josh, who likes to walk the property barefoot, says he can tell where he is on the property by the feel of the ground under his feet. I believe him.
