In a previous post, I described the grid process I used to get to know my land and to locate specific features and identify areas for future projects. This post describes how I used that grid process to place roads and ponds.
Today there are many on-line tools to help with the process of making maps of your property. I mentioned this tutorial in a previous post as a good jumping off point for those who want to learn how to use those tools. It can also be done by going to your local soil and water district and making copies of the maps that show the features of your property. This is how I did it 20+ years ago.
From this information, I created soil type and topography overlays for my grid map of The Land. The first map pictured on the left is the grid map I created and used to begin to
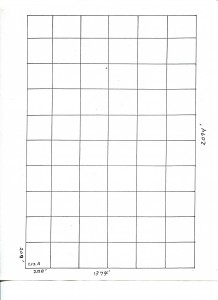
The initial grid created to map the land. Each square is 200 feet by 200 feet.
understand and place particular features of The Land in their proper relationship to one another. Next, I created a topographical map of the The Land, which is shown on the right below. This map was very helpful in the placement of roads and ponds. I used a piece of overhead projector, remember those, film to make an overlay which could be placed over the grid map. I then did the
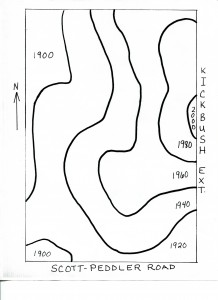
Topography of the land.
same with the soil map, below left, I made, again, from maps and information available from the soil and water district office. Using the grid, topography and soil overlay maps, I could now begin to see areas where the soil type and incline were favorable for pond sites and roads.
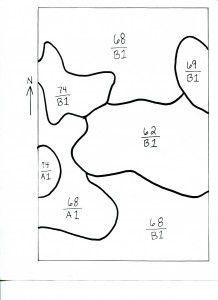
Soil Zones on The Land
The process I used for locating areas for ponds was to look at the topography map and find places where the slope of The Land and the topography lines indicated the potential for water pooling. Soil was not a great concern since most of The Land’s soil is deep clay under a foot or so of gravelly top soil, great for pond building, not so great for gardens and crops. I found three spots that looked the most promising, the south west corner, the south east corner and a third spot, kind of central west. Take a minute and study the topo map and you will see what I am describing.
Once these identified pond sites were located virtually, I went out and walked the sites. I ruled out the site in the south west corner for tree reasons. First, it was closer to the road than I wanted. Second, the general area was fairly flat, as indicated by the increasing distance between the topo lines, and would have required a lot of dozer work to make a good drain field, increasing costs. Third, a pond on this site would have required taking down a stand of red pine and some of the larger white pines on the property. The south east site had very good slope, some tree work would be involved to clear the site but no stands of quality saw timber or unique species would need to be sacrificed to create the pond and field. The distance to the road was acceptable. The third site in the central west area had a great slope for creating the field and pond area. It was centrally located, private, and best of all required very little tree work. The area was dominated by low shrubs, ferns, and hydrophytic (water loving) plants. It was a no brainer to utilize this site for my first pond.
Locating the sites for roads was a similar process but instead of looking for drainage areas I sought to follow the contour lines as much a possible to avoid, as much as possible, creating roads subject to wet spots and erosion. This was not completely possible because I also wanted the roads to give me access to all areas of the land to make logging, forest improvement and walking easier. Again, once the sites were identified virtually, I walked the “roads” and routed them around significant trees and features I wanted to preserve. I used flagging tape to mark the roads so the dozer operator would have a path to follow when building the roads.
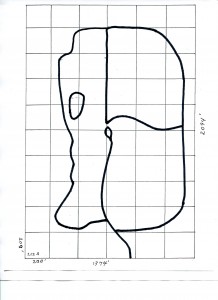
The map on the left shows the end product of the site selection and flagging. All the roads shown on the map are large enough to drive with a pick-up truck or tractor. This gave me general access to all areas of The Land with the equipment necessary to do forestry projects, like forest improvement and firewood collection, and to maintain the roads.
I then located and hired a construction company with experience in road and pond construction to come in and build the pond and roads. This was not cheap, but very important because I wanted my roads and ponds built correctly so they would last and be built to the specifications necessary to meet local ordinances.
A couple thoughts on ponds. In some areas, there are size limitations on ponds. Most of these deal with the amount of water that can be retained behind the dike. Some local ordinances require that architectural drawing be made to ensure a dike of sufficient strength to hold back the water. Your local government and soil and water district can be very helpful with this. Before the pond was dug, I had a representative of my soil and water district do a site visit. This was very helpful.
A couple thoughts on roads. Roads need to follow contour lines as much as possible to avoid erosion problems and boggy, impassable roads in spring and wet times. Roads should also be dozed down to the hard pan which requires taking off all the top soil. This creates roads that are “hard” and therefore less susceptible to ruts and erosion. However, it does create a great deal of brush. A skilled dozer operator will be able to mitigate the “mess” by using techniques like burying some brush and creating contoured piles that over time will become less visible as they are covered with grasses. Because of the woody nature of these piles, they become fertile ground for berry bushes, a nice treat when out for a walk. A skilled road builder will also pitch the roads for better drainage. Except for the main road on The Land, the road from the county road to the circle at the head of the field that drains into the pond, I did not add any gravel or surface topping to my roads. Over twenty years later my roads remain solid, drive-able and the piles and scars, caused by building them, are only noticeable to those who know what to look for.
Planning takes a lot of work. It took us most of the first year of ownership to make this plan and, as I will discus in a future post, I wish I had done more.
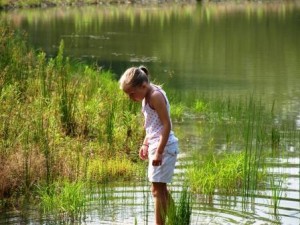 production. These improvements have increased recreational opportunities like swimming and hiking and have created access to all areas of the property for work and observation. While I don’t have any hard data to give you, the result has been that wildlife populations and diversity have increased over the last 20 years. Plantings, specific clearings, and edge creation have caused bird populations to increase, small mammals, like squirrels, are now regularly seen, ruffed grouse and turkey sightings are not uncommon, and deer are ubiquitous.
 my family and my friends, and less importantly yield products that will be income producing in the future. With that in mind, the next big project on The Land will be to create a Food Forest on an approximately one half acre field created about five years ago when we dug a second pond.
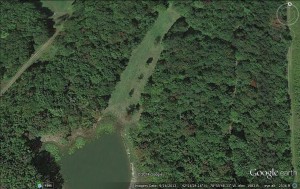
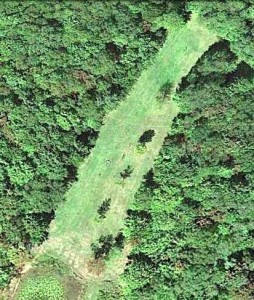 Over the past 5 years we have planted about 10 fruit trees in the field. Of those 7 remain: 2 Elberta Peach, and 5 apple; 2 Cortland and 1 each Yellow Delicious, Lodi, and Red Jonathan. The Cortland started fruiting this season. There is one “structure” in the field, a Peace Pole set in a 10 foot diameter rock garden.


